

| Visual
Inspection And Cleaning Of Connectors |
Table
of Contents: The
FOA Guide |
Visual Inspection and Cleaning Of Connectors Introduction Dirty connectors are one of the major problems in fiber optics, causing high connector loss, high reflectance and contaminating transceivers. Network operators claim that 15-50% of all network problems can be traced to dirty connectors causing connection problems. One of the first visits we made to a fiber optic network user's facilities to demonstrate test equipment, we watched as a technician explained that fiber was so small that it was very sensitive to dirt on the connector. Every connector needed cleaning, he explained, and he demonstrated how he did it by wiping it on his shirt several times with a circular motion like this. 
While his intentions were good, his method, at least with our current knowledge, was not. The shirt was neither clean or lint free. It probably added more contamination to the connector than it removed. Typical environmental dirt is relatively large compared to the size of the core of a singlemode fiber. Much of the dirt is silica-based and hard enough to scratch the fiber if sandwiched between two spring-loaded ferrules. Some cleaning processes may cause problems if done incorrectly; adding a film to the end of the ferrule or causing static electricity that attracts more dirt. Uncleaned or improperly cleaned connectors can transfer their dirt and contamination to another when mated as this series of photos shows.  Sequence shows transfer from dirty connector (bottom) to clean (top) and damage from dirt due to mating (last photos) Photos from Sticklers. And then there is the issue of "dust caps." Within the fiber optic industry, some say that the are called dust caps because they may be filled with dust. Dust caps are molded by the millions, dumped into buckets by the molding machine, packaged and shipped to connector manufacturers in large quantities. They have mold release on them that can attract and hold dirt. At every step along the process they are exposed to environmental dust and contamination. These plastic caps for ferrules or connector bodies should be called "protective caps" because they do protect connectors from damage, for example when dropped, or from additional contamination from touching objects or people's skin. It is not advisable to clean a connector, put on a protective cap and assume the connector will stay clean. When you take them off, clean and inspect the connector to ensure its is clean. Optical Inspection Of Connectors with Microscopes Introduction There are two major uses for visual inspection of fiber optic connectors. Polished connector ferrules require visual inspection during manufacturing to evaluate polishing and find possible defects during the connector termination process. In the field, connectors need inspection for cleanliness and damage before testing or connection to another connector or transceiver. Visual inspection is accomplished using a microscope that has a fixture to hold the fiber or connector steady in the field of view and a light source to illuminate the connector. 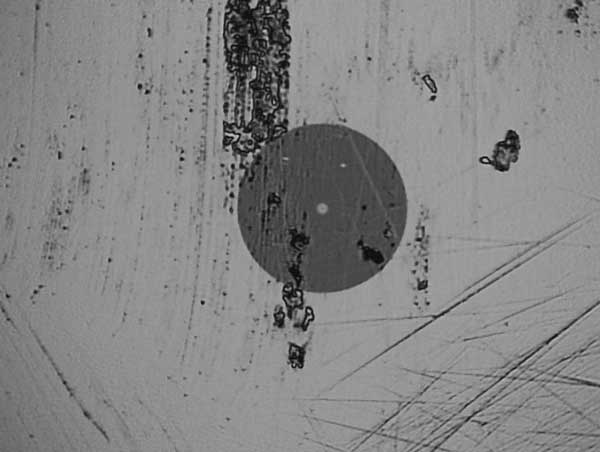 Optical image of connector ferrule end showing dirt and scratches Very inexpensive microscopes included in termination kits are usually modified 100X plastic microscopes intended for science student lab use with an adapter for fiber optic connector ferrules, primarily 2.5 or 1.25 mm. 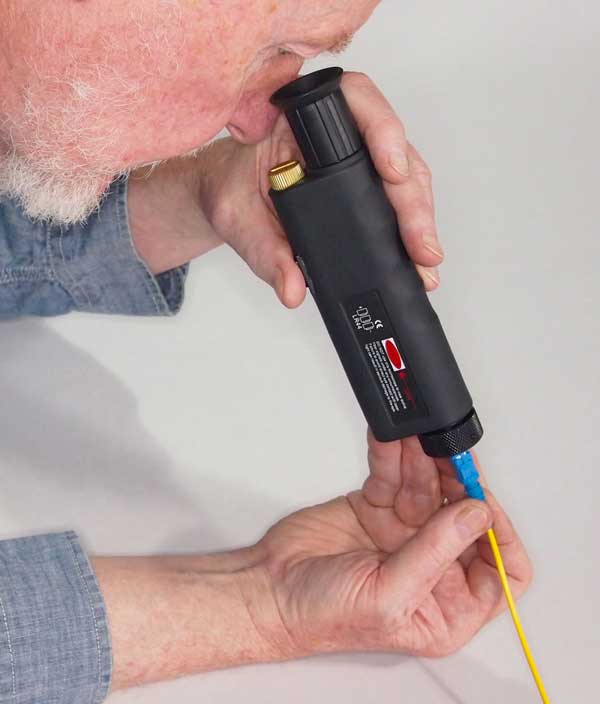 Portable optical microscope used for connector inspection Microscopes designed specifically for fiber optics inspection have more precise connector adapters and usually include filters to protect the user from infrared light that might be present in communications systems. These microscopes also offer higher magnification, 100X to 400X, for closer inspection of polished ferrule ends. Most have better lighting, often direct down the axis of the microscope to see the end clearly and at an angle which helps diagnose polishing problems. Lighting is sometimes provided two ways, direct along the axis of the connector ferrule and at an angle to the ferrule end. Direct lighting helps inspect fibers for cracks and chips or to see if the fiber is aligned properly in the ferrule hole. Angle lighting is used to more clearly show the polish quality and scratches since it shows shadows of any surface irregularities. Note On Eye Safety: Visual microscopes should have a built-in infrared filter to remove any signals being transmitted in the fiber for the protection of the eye of the user. An optical microscope can capture any light in the fiber and focus all of it into the eye, a potential danger to the user. Since the light in most fiber systems is in the infrared (IR) and invisible to humans, it will not be detected visually, even if the power level is high enough to be dangerous. Most fiber optic systems have power levels too low to be harmful but some might - especially telecom and CATV systems with fiber amplifiers or WDM. One should always check power levels with a power meter before inspecting connectors with a microscope. If possible, only use microscopes with IR filters to prevent IR light from entering the eye. A video microscope is preferable since it offers no danger to the eye. Video microscopes use small video cameras and microscope lenses to provide a display of the view on a small video screen or the display of a PC or tablet. They offer more flexibility in magnification and image manipulation. Many of these also offer automatic inspection to international standards for cleanliness and produce pass/fail results. Video microscopes also allow for storing an image of the connector, valuable for documenting the condition of the connector at installation and for reference in the future. 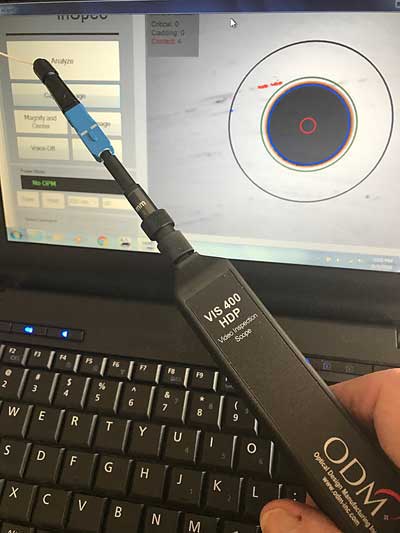 Video microscope view of dirty connector. The screen of the laptop shows analysis of the connector being checked. The analysis is based on ISO/IEC-61300-3-35, the international standard used for most automated connector endface analysis. Microscope Magnification Fiber optic inspection microscopes vary in magnification from 30 to 800 power, with 100-400 power being the most widely used range for connector ferrule inspection. Higher magnification is helpful when for inspecting for proper polish and scratches where you are looking for micron-sized defects. Lower magnification is used to view more of the connector when looking for dirt or contamination. New wide field video microscopes allow looking at the whole ferrule and inside the connector body looking for contamination. These are very useful tools for inspecting for cleanliness, since they allow you to see more of the connector ferrule and body where dust can accumulate and then migrate back to the connector ferrule end where it becomes a problem when mating connectors. 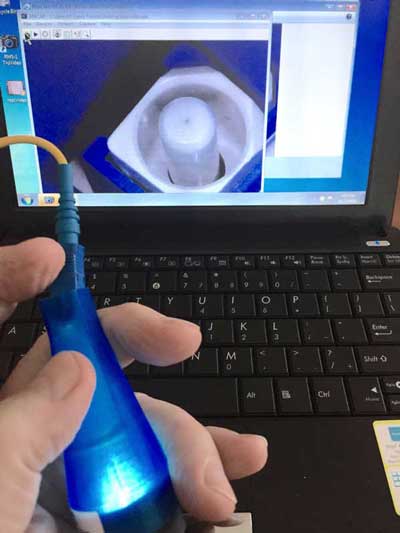 Wide field video microscope view of connector 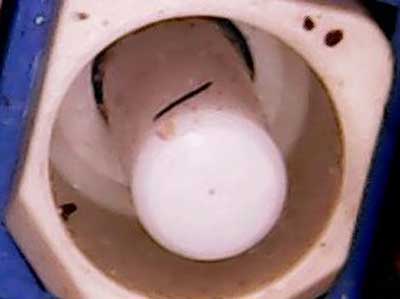 The wide filed view can show dirt inside the connector body that can transfer to the ferrule end when connectors are mated, causing typical dirty connector problems. 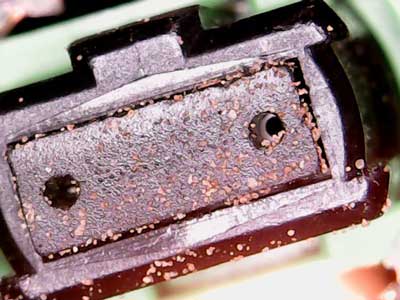 Wide field microscopes are also useful for inspecting MPO connectors like this very dirty one. Inspecting Connectors During Termination When inspecting connectors during termination, you will see lots of variation in end finishes depending on the quality of the termination. Below is something rarely seen, a perfect connector ferrule end face. It's so perfect it doesn't look like a photograph but instead a drawing.  A perfect polished and clean connector ferrule Inspecting Connectors For Proper Termination Connectors are always inspected during the termination process to ensure termination has been done properly. Factory terminations are machine polished and usually inspected by video microscopes that automatically look for defects and provide a report on the connector. These reports may be provided with the finished cable as quality control data. 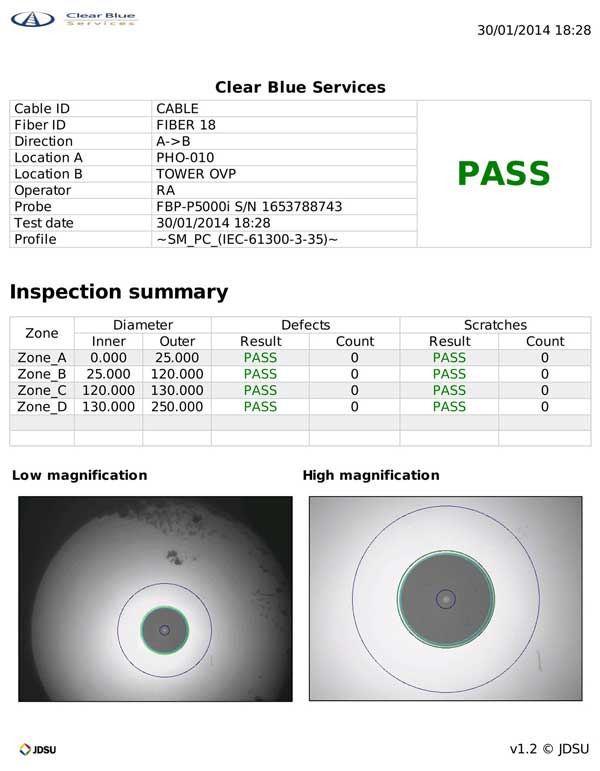 Automated fiber inspection report from video microscope. Note in the automatically generated report above, the inspection is centered on the fiber and ignores the outside of the ferrule, so it might miss dirt on the ferrule that could cause problems later. Like many automated processes, it needs some operator review before being accepted. Interferometry Factory made singlemode connectors may also have inspection done by an interferometer, a device that can provide a profile of the end of the connector. It can verify the end radius and its conformance to standards. It can also profile the polished fiber end, show how well it fits the profile of the connector ferrule, protrusion of the fiber from the ferrule, quality of the polish and find the center of the radius of the curvature of the end of the polished fiber. 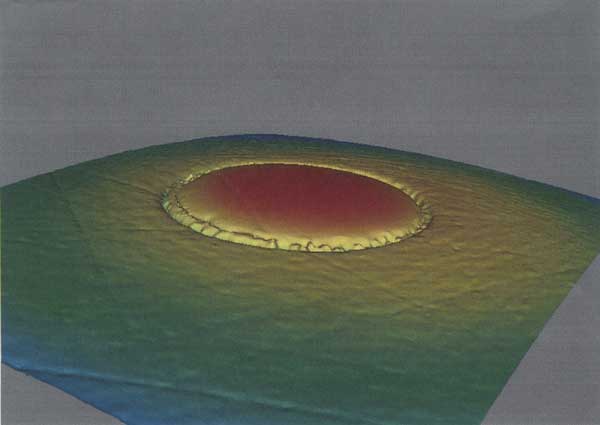 Interferometer profile of polished fiber in connector ferrule (FIBO) Field terminations are more likely inspected with a visual microscope included in a termination kit and the pass/fail decision is made by the judgment of the technician. An experienced technician knows what are the limitations for scratches or defects on the connector based on experience in termination and testing many connectors. The photo at the beginning of this section showed what a excellent connector looks like, but not all connectors are this good. If you look at lots of field-terminated connectors, you are likely to see some ferrules like these.  Microscope views of 3 bad connectors These three connectors show some serious problems in termination. The connector on the left has a large chip on one side and small chips all around. It is heavily scratched and has some pitting. The connector in the middle shows contamination from some liquid, but the rings around the fiber show the epoxy on the fiber end was not completely polished off. The connector on the right shows scratching and chipping also, including one very large scratch across the fiber and the ferrule. All are rejects. Field Inspection Of Connectors For Cleanliness In the field, the biggest use for microscope inspection of connectors is to determine if the connectors are clean enough to use. For cleanliness inspection, lower magnification is preferred because it allows viewing more of the end of the connector ferrule. Here are some photos of connectors needing to be cleaned. 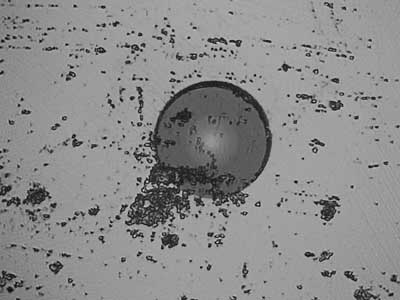 Connector with large amounts of surface dirt 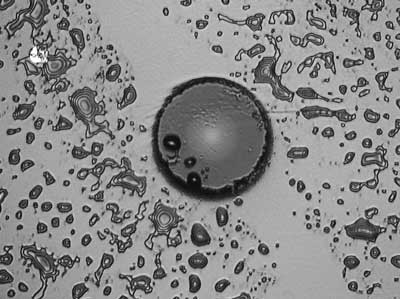 Connector contaminated by oily residue 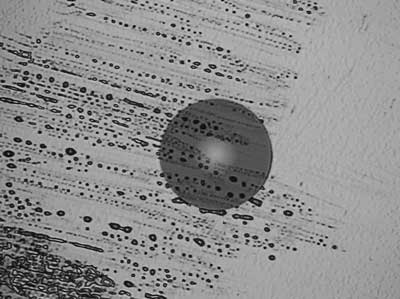 Connector smudged by oil on fingertip Many connectors will have both dirt and residue on the ends that need cleaning. The type(s) of contamination and dirt will only be known if the connector is inspected visually. Cleaning Fiber Optic Connectors Going all the way back to the technician we mentioned cleaning a connector on his shirt, the recommended procedure was to use reagent-grade 99% isopropyl alcohol and a lint free wipe. Isopropyl alcohol (IPA) was recommended because it was an effective solvent to remove most oily contamination and was not harmful to the epoxies used in termination. However it was hard to find and if bought in bulk, it absorbed water from the air (hygroscopic) and became easily contaminated. 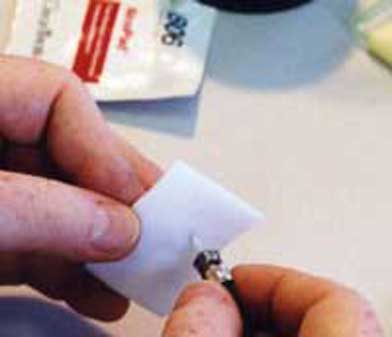 Alco-Pads being used to clean connector for testing A better solution was to buy prepackaged lint-free alcohol-soaked pads called "Alco-Pads." The sealed packages kept the alcohol pure and proper use of the pads made for easy "wet-dry" cleaning. The recommended method was to open one corner of the sealed package and start cleaning on the exposed pad while it was wet. The alcohol evaporated quickly leaving dry sections of the pad, so the two steps of cleaning were to clean on a wet section and dry on a dry section of the pad. This generally produced acceptable results. Often you will see techs with a tabletop bottle of IPA and some wipes. The IPA rapidly becomes contaminated by moisture and wipes will attract dirt or pick dirt up from the tabletop. Even in patchcord manufacturing facilities, these processes may be used and connectors are often only superficially clean. Always remember to inspect and clean brand new patchcords out of their sealed bags before using them. As the need for proper cleaning of fiber optic connectors became better known, manufacturers of cleaning products began to do research on how to clean connectors properly and created products aimed at special applications. They developed dry connector cleaners, using treated lint-free tapes in cassettes, boxes or small hand-held tools (probes) that could reach into a mating adapter and clean a connector at the far end. Some of the probes can even clean inside the mating adapter, although that is usually best done with a special swab. Special cleaners also addressed the issue of static electricity which can attract dirt to freshly cleaned connectors. 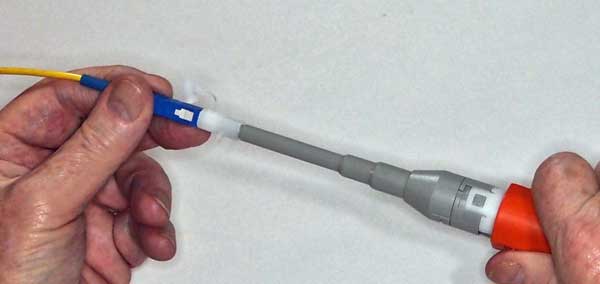 Probe type cleaner used with SC connector 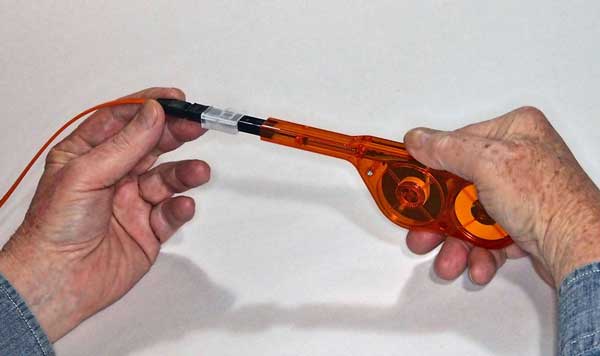 Probe type cleaner used on the wide ferrule of a multifiber MPO connector 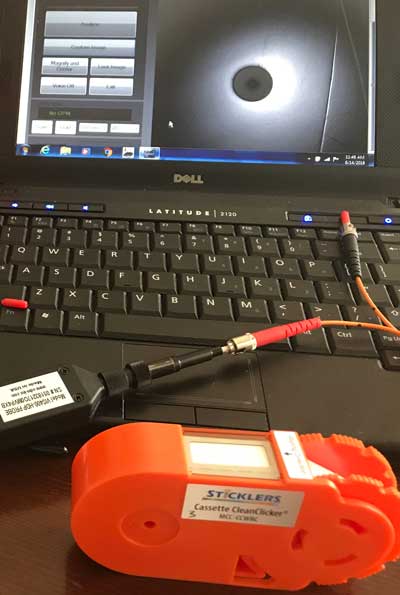 Cassette style fiber cleaner moves new cleaning tape into opening for each connector These dry cleaners are very convenient and fairly effective. One drawback of the dry cleaners is they may generate a static charge on the end of the fiber optic connector ferrule that attracts airborne dust. Rubbing a glass rod with a silk cloth is a classic method of demonstrating static electricity. Some of the dry cleaners now have been designed to be conductive to prevent static buildup. Wet/dry cleaning is generally the preferred method of cleaning connectors. The wet part of the process will loosen dirt and contamination and the dry process will remove them. Much research has gone into developing cleaning solutions that are better at removing dirt, do not generate static and are safer. IPA and many cleaners, including that in typical "canned air" are flammable! They are not safe for use in all environments (remember fusion splicers use an electric arc) and often cannot be legally shipped. The wet/dry process works with a fairly large wipe or the boxes of cleaning wipes shown below. You wet on end of the cleaning wipe with a cleaner solution then wipe the connector from the wet to the dry side of the wipe. This quick process should get the connector clean but only visual inspection will confirm the connector has been properly cleaned. 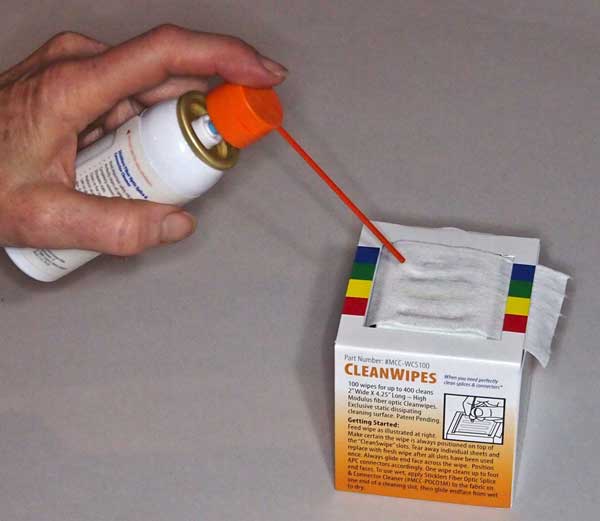
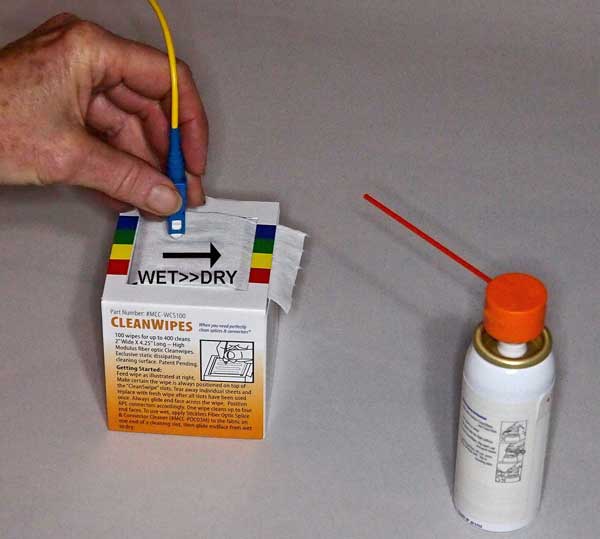 Wet to dry cleaning in one swipe You can do wet/dry cleaning with the probe type cleaners too by dampening the end of the probe and following the cleaning process, then make a second cleaning with a dry probe. Those that click advance the cleaning strip automatically, so you can just click once with the wetted end then click again and it will have a dry tape. Protecting And Cleaning Test Equipment And Cables While we have been mostly discussing cleaning cables, a process that applies to any cable, the fiber tech also needs to apply these cleaning guidelines to their reference test cables and equipment to ensure that dirt and contamination do not adversely affect testing. Obviously, reference test cables need special handling. They should be cleaned before use and every cable they test must be cleaned before use. Mating a perfectly clean reference cable to a dirty connector on a cable under test will likely not only cause high loss but the dirty connector may contaminate the connector on the reference cable and the mating adapter used. Consistent cleaning is very important. The same advice about cleaning cables apples to test equipment. The connector receptacles on test equipment should be cleaned in the same manner as transceivers. Dirt here will affect the output power of the test source and input of the meter, and changes in the cleanliness will change the calibration of test setups. Of course sources should be cleaned before attaching a (cleaned) connector on a launch reference cable. Of course that cable should not be disconnected or the 0 dB reference will be lost and have to be recalibrated. Meters that have removable adapters on the detector should be cleaned periodically. This can be done by removing the adapter and cleaning it like a mating adapter, then wet/dry cleaning the surface of the detector on the meter with connector cleaning pads. Both source outputs and meter inputs should have protective caps to keep dust from entering the receptacles when cables are not attached. The same advice holds for connector inspection microscopes. Imagine how dirty they must get since dirty connectors are inserted into their adapters all the time. Exercises • Using a patchcord with a good connector, remove the dust cap and examine the condition of the ferrule end. Clean and reexamine the connector ferrule. Is it in better condition? • Touch the end of a clean ferrule with your finger or your face (oily skin is preferable) and inspect the condition of the end of the ferrule. Clean and reexamine the connector ferrule. • Wipe a clean connector across a rug on the floor and inspect the condition of the end of the ferrule. Clean and reexamine the connector ferrule. • Using a dirty connector made by one of the processes noted above, try dry cleaning and wet/dry cleaning. Which works best? And do try getting a connector quite dirty and cleaning it on your shirt! |
|
|